 Save to Pinterest
 My little cousin once grabbed a Rice Krispy treat straight from the pan before the chocolate had set, and her fingerprints stayed frozen in the glossy surface like fossils. We laughed so hard we nearly ruined the whole batch. That messy moment taught me the value of patience—and also that these treats are irresistible at every stage of making them. Now I always make extra, knowing at least one will disappear before it's officially done.
I brought a tray of these to a potluck once, and they vanished before the main course was even served. People kept asking if I'd used some secret ingredient, but the magic is really just in the layering. The way the chocolate seals in the marshmallow sweetness makes each square feel like a little gift. Even the pickiest eaters at the table came back for seconds.
Ingredients
- Unsalted butter: This is what makes the marshmallows melt smoothly without any graininess, and a little extra for greasing ensures clean release from the pan.
- Mini marshmallows: They melt faster and more evenly than large ones, creating that signature gooey binder without hot spots.
- Rice Krispies cereal: The classic snap, crackle, pop base—don't substitute with off-brand cereal unless you want a soggier texture.
- Fine sea salt: Just a pinch cuts through the sweetness and makes the chocolate topping taste richer and more complex.
- Semisweet or dark chocolate chips: Choose based on how sweet you like things—dark chocolate adds a sophisticated edge that balances the sugary base.
- Vegetable oil or coconut oil: A tiny bit keeps the chocolate glossy and smooth, preventing it from seizing or turning chalky.
- Rainbow sprinkles or chopped nuts: These add color, crunch, and a festive touch that makes the bars look as fun as they taste.
Tired of Takeout? 🥡
Get 10 meals you can make faster than delivery arrives. Seriously.
One email. No spam. Unsubscribe anytime.
Instructions
- Prep Your Pan:
- Lightly grease an 8x8-inch or 9x9-inch square baking pan with butter, making sure to get into the corners. This step saves you from wrestling with stuck-on marshmallow later.
- Melt the Butter:
- In a large saucepan over low heat, melt the butter while stirring constantly to keep it from browning. You want it just melted, not bubbling or sizzling.
- Melt the Marshmallows:
- Add mini marshmallows and keep stirring until they turn into a smooth, glossy pool. The mixture should look like melted clouds with no lumps.
- Season and Remove:
- Take the pan off the heat and stir in sea salt if using. This is your last chance to add any flavor tweaks before the cereal goes in.
- Fold in Cereal:
- Add Rice Krispies and gently fold with a spatula until every piece is coated in marshmallow. Be gentle so you don't crush the cereal into dust.
- Press into Pan:
- Transfer the mixture to your prepared pan and press it down evenly and firmly using a buttered spatula or clean hands. Even pressure means even bars later.
- Cool the Base:
- Let the pressed layer sit at room temperature for about 10 minutes to firm up slightly. This makes it easier to spread chocolate on top without tearing the surface.
- Melt the Chocolate:
- In a microwave-safe bowl, combine chocolate chips and oil, then microwave on medium power in 30-second intervals, stirring after each. Stop as soon as it's smooth and glossy to avoid scorching.
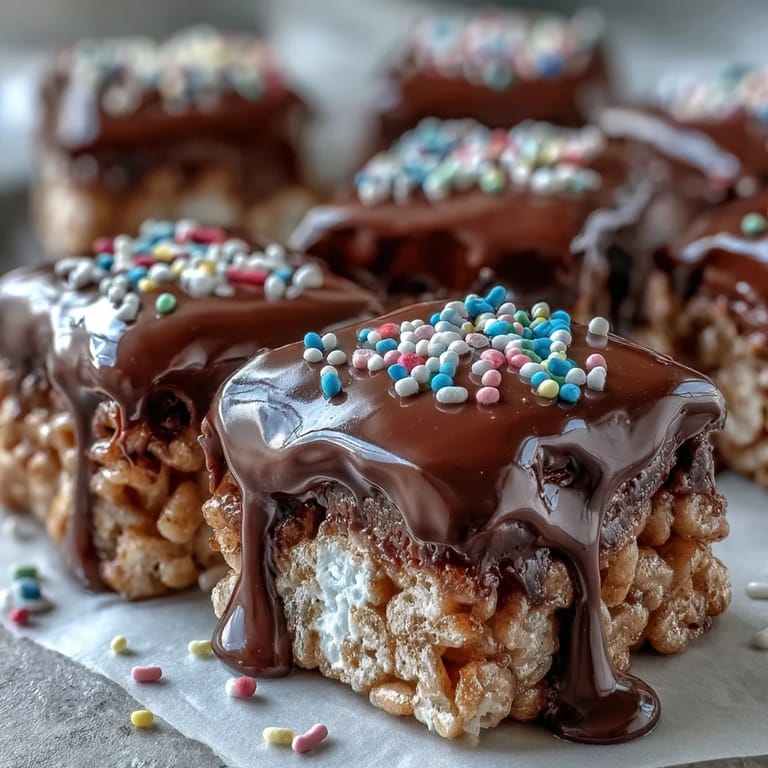
- Pour and Spread:
- Pour the melted chocolate over the cooled Rice Krispy layer and spread it evenly with an offset spatula or the back of a spoon. Work quickly before it starts to set.
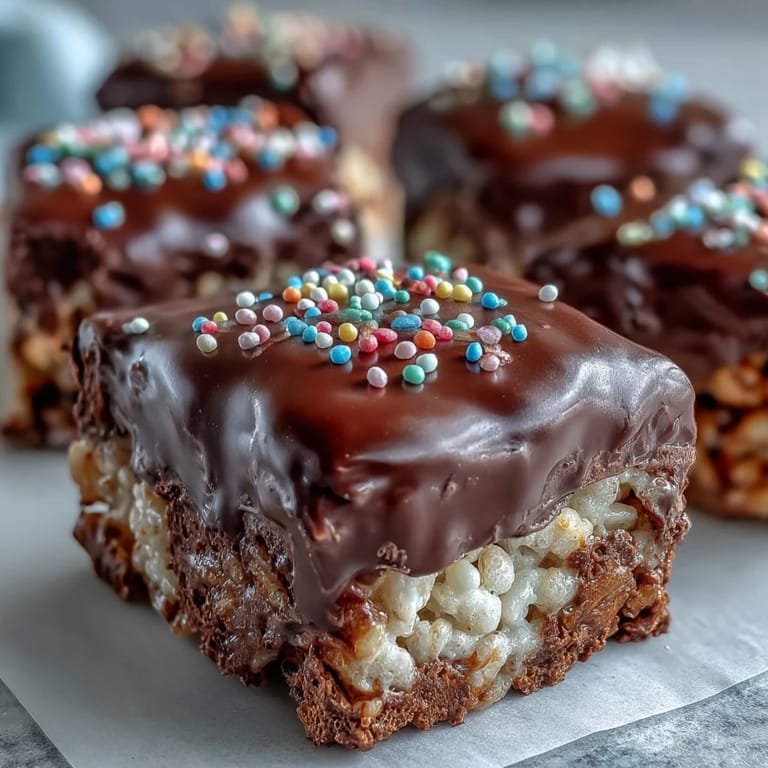
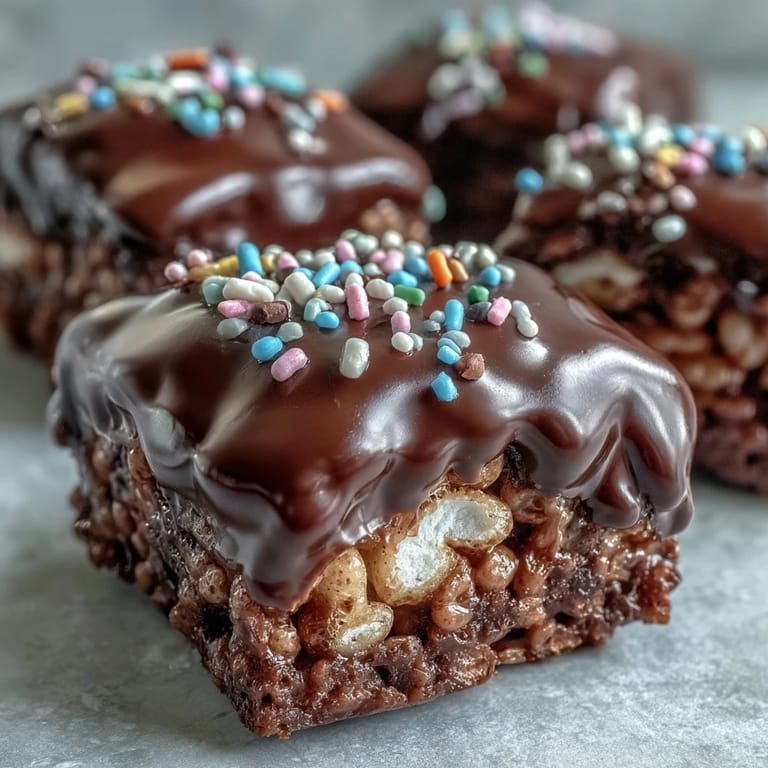
- Add Toppings:
- Immediately sprinkle with rainbow sprinkles or chopped nuts if desired. Press them gently so they stick into the chocolate.
- Let It Set:
- Allow the treats to set at room temperature for at least 1 hour, or refrigerate for 20 to 30 minutes until the chocolate is firm. Patience here prevents smudged chocolate and messy cuts.
- Cut into Bars:
- Once set, lift the block from the pan or invert it onto a cutting board, then cut into 12 to 16 bars with a sharp knife. Wipe the blade between cuts for clean edges.
 Save to Pinterest
 One winter evening, I made these with my neighbor's kids during a snowstorm, and we decorated each bar differently—some with sprinkles, some with crushed peppermint, one with way too many chocolate chips. They lined them up on the counter like a rainbow and insisted we take photos before anyone could eat them. That's when I realized these treats aren't just about taste—they're about the joy of making something together.
Storing and Keeping Them Fresh
I learned the hard way that leaving these uncovered turns the cereal stale and the chocolate dull within a day. Now I always store them in an airtight container at room temperature for up to three days, or in the fridge for up to a week if I want the chocolate to stay extra firm. If you stack them, place parchment paper between layers so they don't stick together. They also freeze beautifully for up to a month—just thaw at room temperature for about 15 minutes before serving.
Flavor Variations to Try
Once you've mastered the classic version, the possibilities open up like a treasure chest. I've stirred in half a teaspoon of vanilla extract with the marshmallows for a warm, bakery-like aroma, and I've swapped semisweet chocolate for white chocolate with pastel sprinkles for Easter. One friend drizzles peanut butter over the chocolate layer before it sets, and another uses crushed pretzels instead of sprinkles for a salty crunch. The base recipe is so forgiving that you can experiment without fear.
Troubleshooting Common Issues
If your marshmallow mixture turns grainy, it usually means the heat was too high or you didn't stir enough—low and slow is the mantra. If the chocolate seizes and becomes clumpy, it likely got too hot or moisture snuck in—add a tiny bit more oil and stir gently to bring it back. If the bars are too hard, you pressed too firmly or let them sit too long before cutting. And if they fall apart, the marshmallow might not have been melted enough to bind the cereal properly.
- Always use low heat and stir constantly when melting butter and marshmallows.
- Make sure your chocolate is completely smooth before pouring, and work quickly once it's on the bars.
- Cut with a sharp knife in one confident motion, wiping the blade between each slice for bakery-clean edges.
 Save to Pinterest
 These treats have become my go-to for last-minute gatherings because they're fast, foolproof, and always make people smile. Whether you're feeding a crowd or just craving something sweet and crunchy, this recipe delivers every single time.
Questions & Answers
- → How do I keep Rice Krispy treats from getting hard?
Don't overcook the marshmallows—melt them just until smooth and remove from heat immediately. Press the mixture gently into the pan rather than packing it down tightly, which compresses the cereal and makes the bars dense. Store in an airtight container to maintain softness.
- → Can I use white chocolate instead of semisweet?
Absolutely! White chocolate creates a delicious contrast and looks stunning with pastel sprinkles. White chocolate may melt slightly faster than dark, so watch it carefully when microwaving. It also sets a bit softer, so consider refrigerating for 30 minutes to firm up before cutting.
- → Why add oil to the chocolate topping?
The vegetable or coconut oil helps the chocolate melt smoothly and creates a glossy, professional finish. It also prevents the chocolate from seizing (becoming grainy) and makes it easier to spread evenly over the cereal layer. Just a teaspoon makes a big difference in texture and appearance.
- → How long do these treats stay fresh?
Store in an airtight container at room temperature for up to 3 days, or refrigerate for up to a week. The chocolate may lose some gloss when refrigerated but will regain it at room temperature. For longer storage, wrap individually and freeze for up to 6 weeks—thaw at room temperature before serving.
- → Can I make these without butter?
You can substitute coconut oil or vegan butter sticks for the dairy butter to make these dairy-free. The texture remains similar, though coconut oil adds a subtle coconut flavor. For a classic taste, butter provides the richest result and helps the marshmallows melt evenly without sticking.
- → What's the best way to cut clean squares?
Let the chocolate set completely before cutting—at least 1 hour at room temperature or 30 minutes in the refrigerator. Use a sharp knife and wipe it clean between cuts. For extra precision, score the chocolate lightly with a warm knife, then press down firmly to complete each cut.